|
| |
8) The Briefing
Briefings are likely to be the most complicated part of XvTED, thankfully, they are probably the least mandatory to do very well in. Below is where you will find the button for the briefing window to appear in XvTED.

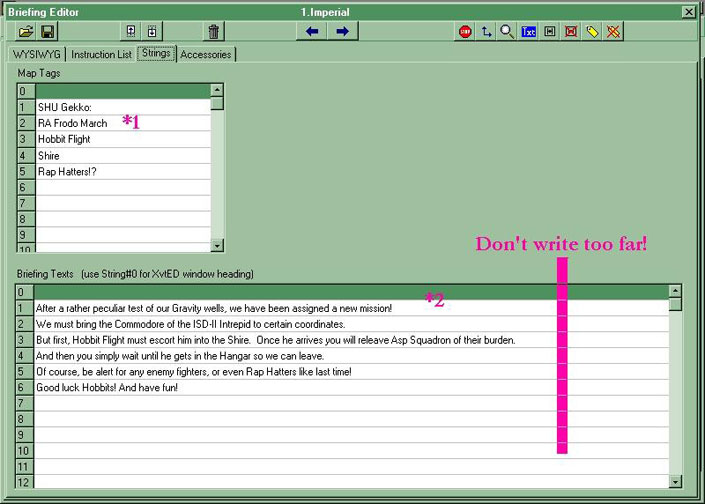
Click on that and you will get the briefing screen to appear. It has four flaps, start by clicking on the one that says strings, the following will appear.

The string labelled 0 for the strings is used for the XvTED header, it isn't used in this mission, as you can see.
Map Tags (*1): Map tags are the text that appears on the actual mission map, write in these strings what you want for your map tags, each string is one map tag. They can potentially be any colour.
Briefing Strings (*2): This is the bulk of your briefing, this is what will appear line by line at the bottom of the briefing map. Rember that anything between brackets ( [Brackets] ) will appear highlighted in green in XvT, but not in XvTED. Also, try not to write too far, the purple line is a pretty good guide. Overlapping the line is risking having part of your text not appear in XvT.
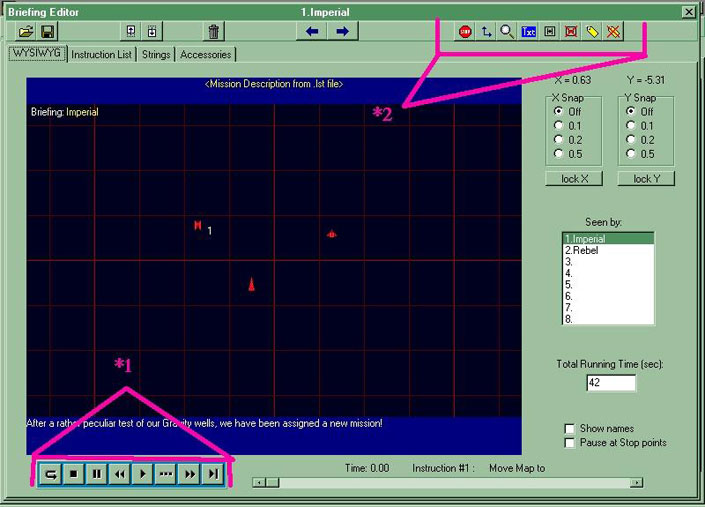
Once this page is filled in click on the "Accessories" flap, and then click on make briefing. Then you'll want to go to the "WYSIWYG" flap, (What you see is what you get). The "Instruction list" flap is where your briefing code appears...it is possible to make your briefing entirely from there, but it is lenghty, and difficult.

Click on the icons...to drag them and drop them in the places you want them.
Right click...on the map and select "Set to start 1" for the icons on the briefing map to adopt the positions they had on the mission map.
Controlling the time (*1): Here Is where you play around with the briefing strings " >| " changes strings, ">>"; and "<<"; aren't important they only fast forward or rewind back to the begining or end, ">" Plays, the square stops, and "..." is to advance the time 0.05 seconds. While using these features, you move along in the time and strings until you get to the time where you can use your effects.
Effects (*2): The effects are: 2 little arrows that allow you to move everything, a yellow tag button, which is to add a tag. You click on the button, select a tag and a colour and then you move the tag to where you want it. And then the zoom, which is a magnifying glass button, you press on it and zoom in or out using the scroll bar that will appear once you click on it. And lastly, box fg button, which you click, select an fg to box and the FG will be boxed. You can also click on the Box fg button with an red X on it to unbox all fg and the same goes with the yellow tag with the X on it when it comes to map tags.
Experimenting with briefings is likely the best way to master them, don't worry too much if they don't come naturally at first.
Next: Misc
|
|


