Home
Course Notes
Course Test
Tutorials
Graduates
Imperial Academy


6) Tutorial to create a button in Photosho/PaintShop Pro.

This tutorial is intended to assist, and inspire. Please try to add your own flare in these buttons, as they are needed for the final question on the test.

Step 1
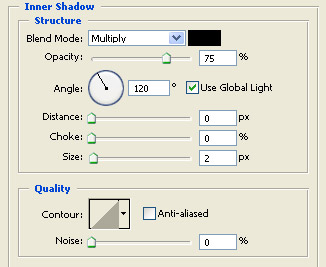
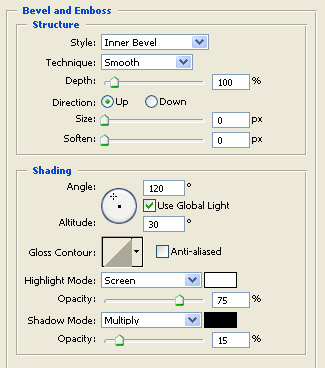
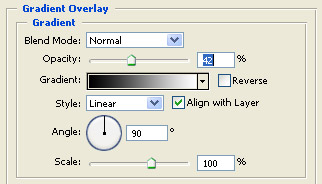
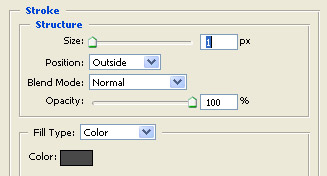
Make a new document 500x500 pixels. Make the background layer a dark grey so we can see what we are doing. Once you've done that make a new layer and call it micro button. Select your rectangle marquee tool and make a fixed slection of 150x19. Then go to select > modify > smooth and then enter in 4.


Step 2
While selected on the layer "micro button" simply go to Layer > Layer Style > Blending Options > Inner Shadow once you've done that enter in the details as shown below.


Step 3
Now select the Bevel and Emboss and enter in the setting as shown below:


Step 4
Now select the Gradient Overlay and enter in the setting below:


Step 5
Select Gradient option and do as followed.


Final Result
You should now have something that looks a bit like the image shown below. I used the font Verdana and size 10px for the font. Play around and see what you can come up with.

.: To the test! :.


Site designed by LC Brent Tainer - Original Course by Kadon Berrie - Refurbish by LC Brent Tainer - Copyright - Imperial Academy